Laying tile used to be arduous and time consuming – something that took quite a lot of skill and effort as well as time to produce something beautiful, to say nothing of cost. Admittedly, installing tile flooring is probably still best left in the hands of a pro. But modern materials and techniques have moved the tile backsplash solidly into the realm of the DIYer. True mosaics are still a work of art, but mosaic tile sheets? Are a quick and easy weekend project that can dramatically increase the appearance of your kitchen or bathroom – not to mention protect your walls from moisture.
What Are Mosaic Tile Sheets?

Traditionally, “mosaic” meant intricate designs and detailed planning before you could even think about laying the tile. But now you can buy sheets of tiles already arrayed in a pattern and secured with a fine, usually nylon, mesh. The sheets are usually about a foot square, with interlocking edges that fit together when laid side-by-side. Designs range from simple squares or subway tile to really ornate and intricate patterns that would be too challenging for most people to install otherwise. This set design means that once you pick your tile, you won’t have much room to tweak the pattern. But it also sets you up for a professional looking finish, no matter your experience level.
Can I Really DIY My Own Backsplash?

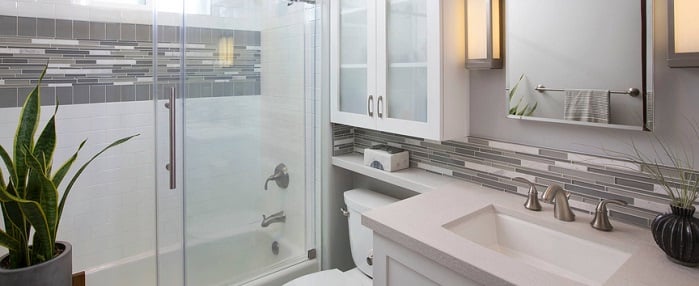
Over the past few years, tile backsplashes have become a must-have feature in both the kitchen and the bathroom. Not only do they serve an important function (protecting the area around your sink from water damage), but they’ve become a great opportunity to add personality and flair to your space. Neither very large nor very small tile is particularly DIY friendly. But mosaic tile sheets close the skill gap needed to install your own tile backsplash. Instead of placing hundreds of individual tiles by hand, tile sheets allow you to install a whole square foot at once. That means you can get the complex designs you want without professional help. How? Follow these simple steps.
1. Prep Your Space (And Do Your Math)

You want to make sure the surface you’re tiling is clean and very dry. If you have existing tile or paint, you should strip everything down to the base layer and make sure that it’s extremely clean. If you expect the tile to see a lot of water, you should consider installing a concrete backing board (which usually just needs to be screwed in) for extra protection. It’s a good idea to figure out the area of the space you’re going to be tiling before you start installing them so you know exactly how many tile sheets you’ll need, and how to arrange them best to minimize cutting. You can trim the nylon parts of the sheets with scissors, but you’ll need a tile cutter to even up edges and corners.
2. Lay Your Thinset (On A Nice Day)

Once you’ve prepped your wall and tile, you’re ready to start. You’ll get the best results if you work over a few moderate days (50-70 degrees or so) with low humidity. You also want to keep your materials at room temperature, as it will ensure that everything sets properly. First, spread a layer of thinset adhesive over the area you’ll be tiling, gradually spreading and thinning it down to about 1/8″. Then, press the sheet of tile mesh-side down and press firmly into place. Use your hands first, then a wooden board or float, working out all the air bubbles and making sure the tiles are secure.
3. Get In The Groove

Keep working, laying one sheet at a time, ensuring the joints match up and removing any excess thinset. At the seams between the sheets, double check the spacing. Take extra care with staggered edges; you might need to flip them to make sure they alternate properly, and they can be a little harder to space. Once everything is lined up, press the tiles gently into the adhesive with a grouting float placed halfway on each sheet to unify the edges.
4. Remove Protective Paper And Wipe Tile

Tile sheets usually come with paper covering the tile faces to prevent them from becoming damaged during transportation and installation. Once all you’ve laid all the tile, wait 15-30 minutes and then gently spray the paper with water from a spray bottle repeatedly over a 5-10 minute period. Once the paper absorbs the water, you should be able to peel it off easily, revealing the pristine tile underneath. Wait 24 hours before you try to wipe off any excess glue off your new tile backsplash. Use this time to make any necessary adjustments and make sure all your tiles are lined up properly before the adhesive cures.
5. Clean, Dry, And Seal

After 24 hours, wipe your tiles – gently! – to clean of any remaining paper or residue. The tiles should be completely set by now, but even so, be gentle, especially with textured tile. You don’t want to accidentally push one out of place trying to get the crevices clean! Once the tiles are dry, spread a sealant on stone tiles or grout release on any other kind, to make sure the grout won’t stick to the surface of the tile. Then mix your grout (powder + admixture) adding the powder to the liquid rather than the other way around. The grout should stick to a float held upside down, and be the consistency of toothpaste.
6. Mix And Spread Your Grout

Spread the grout with a grout flow at a 45 degree angle, pressing the grout firmly in between the tiles until it’s packed firm and about even with the tile surface. You should work in 10 minute sections, wiping away excess grout as you go with a damp sponge to ensure that it doesn’t dry onto the tiles, and to make sure the grout lines are even and smooth. You can wash away any remaining film with a grout haze remover within 30-40 minutes, but you shouldn’t wait much longer than that.
7. Seal The Deal

Finally, after 2-3 days when the grout has dried, you want to seal it with a stone seal, which helps preserve the grout and blocks water absorption to make sure your backsplash is 100% water tight. Wipe off any excess immediately with a dry paper towel, and then step back and admire your handiwork: you just installed your own tile backsplash!
Pingback: Is It Time To Replace Your Bathroom Faucets?
Pingback: Unique Freestanding Bathtubs - Stylish Wood Bathtubs And Glass Whirlpools
Pingback: 2013 Kitchen Design Trends - Top Ten Kitchen Trends For The New Year
Pingback: 2013 Bathroom Trends - Top Ten Bathroom Updates For The New Year
Pingback: Do’s And Don’ts For Your Next Bathroom Remodel - homethangs.com